Basic Guide For The Preparation Of External Plaster
External masonry walls are finished using suitable materials for a variety of purposes, such as decorative appearance, protection from rain particles, increased durability, etc. The process of finishing an external wall is called ‘rendering’ , and the finished surface is called a “Rendered Finish”.
The external plastering depends on many factors, such as the performance desired for the building, the degree of maintenance required, the cost, etc. External finishes come in many forms. e.g., Sand-faced, pebble-dashed (roughcast), smooth cast, etc. The exterior walls of buildings are finished using suitable materials. The color and specification of the walls depends on several factors, such as.
- Decorative appearance desired
- Maintenance level
- Protection against rain penetration
- Climate conditions can affect the durability
- Background material for the surface to be finished
- The period of the year that the finish must be applied
- Cost
Surface preparation is, therefore of paramount importance. To achieve a uniform wall surface, all projections that extend more than 13mm beyond the surface of the masonry face must be removed.
This is the preparation for the external plaster:
1. Before Plastering Work
- Make sure that all masonry work has been completed before starting the external plaster.
- Plastering will be easier if scaffolding is built in advance.
- Fill in the gaps on the outside of the beams and walls and the joints between the masonry. This was previously impossible from the outside without scaffolding.
- Remove all wood, paper, rope, etc. Remove all unwanted materials, such as wood, paper, Kathy (rope), etc.
- Pre-wet surfaces one day prior to plastering.
- Before plastering, check the top level of the parapet walls
- Make sure you check all windows, doorframes, etc. Check for plumb, level, and line. Before plastering, any defects must be rectified.
- Verify that the elevations are correct according to the architectural drawing
- Before starting external plaster, mark level dots
- If your R.C.C surface is affected by efflorescence or green algae, use a wire bristle to clean it.
- Line Dori should be drawn from the top slab down to the bottom, including all corners, windows and elevational features. Also, put a line for R.C.C. Grill and all straight lines in that part.
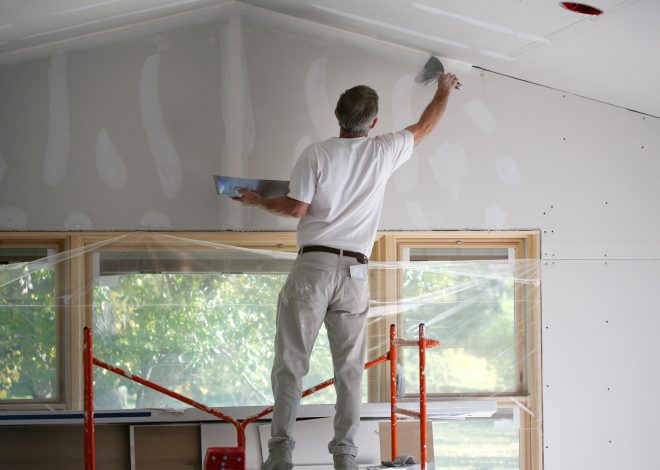
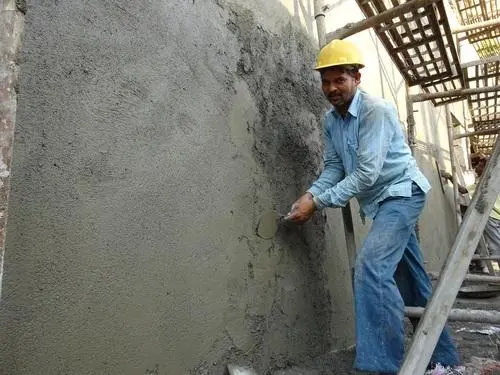
2. During Plastering
- For the plaster to be strong enough, it is recommended that you start two days before.
- Avoid using thick plaster.
- With a wire bristle, clean all the surfaces and joints thoroughly. Make sure that there is no oil or grease on them.
- Drill a hole in the wall, column, or beam to fix chicken mesh at all joints between masonry and R.C.C.
- For external plaster, choose the chicken mesh with a 12 mm mesh size and a 24 gauge.
- By using a cutter, cut the chicken mesh into a minimum of 20 cm to a maximum of 23 cm.
- Fix the chicken mesh to the joint between R.C.C. and masonry walls by using wire nails and plumbing nails.
- The chicken mesh will cover half of the R.C.C. member and the other half the masonry wall.
- The chicken mesh should be tight in both vertical and horizontal directions.
- The spacing between nails should not exceed 9″ (23cm) in order to prevent the chicken mesh from buckling or loosening and coming out of plaster.
- The surveying instrument/centre bobs will be used to align and fix level pegs onto outer wall surfaces.
- Fix the line Dori (string), from top slab to lower level, on all corners of walls, windows, elevational features, R.C.C. grill, and all straight lines within that portion.
- After completing the levelling, the projecting surface of the walls that are out of plaster and/or have an uneven surface is removed.
- On surfaces with a required mortar thickness of 20mm or more, a first coat of mortar (1:4 Cement & Sand) will be applied up to 12mm.
- The external wall plaster is finished with a rough finish.
3. After Plastering
- Minimum 7 days of curing time is required after the plasterwork has been completed.
4. Scaffolding
When contractors are resourceful, they will use scaffolding with “H” frames and steel tabulars. These scaffolds are self-supporting so there is no need to support the wall when plastering.
Double scaffolding may not be used in smaller projects. When only one scaffolding is being used, the contractor will erect just one bamboo raw and support it with external walls that are to be painted. To support the wooden balls, contractors usually drill holes in walls to support them. The holes are left in the wall during the first coat, and they will be filled only after scaffolding has been removed. The plaster joint is created by not doing it well.
This will not only cause a bad patch to appear, but also allow water to enter. Moisture enters through this hole and makes the walls moist. The fact that such holes are difficult to cure is not in doubt. Use double scaffolding as much as possible when plastering externally.
The selection of a particular plaster is based on several factors, such as the availability of materials, location of the plastering surface and weather conditions, economics, desired decorative appearance, etc. For more details – https://www.benandsonspainting.co.nz/service/plastering/